git
简介
Git是一种是分布式代码版本控制系统。可以有效、高速地处理从很小到非常大的项目版本管理。也是Linus Torvalds为了帮助管理Linux内核开发而开发的一个开放源码的版本控制软件。
git和svn的区别:
1.GIT是分布式的,SVN不是:这是GIT和其它非分布式的版本控制系统,例如SVN,CVS
等,最核心的区别。
2.GIT把内容按元数据方式存储,而SVN是按文件︰所有的资源控制系统都是把文件的元信
息隐藏在一个类似.svn,.cvs等的文件夹里。
3.GIT分支和SVN的分支不同:分支在SVN中一点不特别,就是版本库中的另外的一个目
录。
4.GIT没有一个全局的版本号,而SVN有∶目前为止这是跟SVN相比GIT缺少的最大的一个特
征。
5.GIT的内容完整性要优于SVN:GIT的内容存储使用的是SHA-1哈希算法。这能确保代码内
容的完整性,确保在遇到磁盘故障和网络问题时降低对版本库的破坏。
git安装及使用
安装:
centos系统使用yum安装即可(ubantu则是apt-get),git本身对版本无过多需求,所以也无需在意版本号。
yum -y install git //安装git
使用:
配置git仓库
Git提供了一个叫做git config 的工具,专门用来配置或读取相应的工作环境变量。
这些环境变量,决定了Git在各个环节的具体工作方式和行为。这些变量可以存放在以下三个不同的地方:
/etc/gitconfig文件:
系统中对所有用户都普遍适用的配置。若使用git config时用–system选项,读写的就是这个文件。
~/.gitconfig文件:
用户目录下的配置文件只适用于该用户。若使用git config时用-global选项,读写的就是这个文件。
当前项目的Git目录中的配置文件(也就是工作目录中的.git/config文件)︰这里的配置仅仅针对当前项目有效。每一个级别的配置都会覆盖上层的相同配置,所以
.git/config里的配置会覆盖/etc/gitconfig中的同名变量。
git config
–global 使用全局配置文件
–system 使用系统级配置文件
–local 使用版本库级配置文件
git config –global user.name “ysw” 配置使用用户
git config –global user.email “1@qq.com“ 配置使用邮箱
git config –global color.ui true 语法高亮
[root@localhost ~]# git config –list
user.name=ysw
[root@localhost ~]# cat .gitconfig
[user]
name = ysw
email = 1@11.com
查看设置的用户和邮箱
git初始化
mkdir git_data && cd git_data
git init //初始化 在git-server上应该使用用git –bare init
git status //查看工作区状态
//查看git创建的仓库文件
[root@localhost git_data]# ll .git/
总用量 12
drwxr-xr-x 2 root root 6 5月 25 21:27 branches
-rw-r–r– 1 root root 92 5月 25 21:27 config
-rw-r–r– 1 root root 73 5月 25 21:27 description
-rw-r–r– 1 root root 23 5月 25 21:27 HEAD
drwxr-xr-x 2 root root 332 5月 25 21:27 hooks
drwxr-xr-x 2 root root 21 5月 25 21:27 info
drwxr-xr-x 4 root root 30 5月 25 21:27 objects
drwxr-xr-x 4 root root 31 5月 25 21:27 refs
branches //分支目录
config //定义项目持有的配置选项
description //仅供git web程序使用
HEAD //指示当前的分支
hooks //包含git钩子文件
info // 包含一个全局排除文件(exclude文件)
objects // 存放所有数据内容,有info和pack两个子文件
refs // 存放指向(分支)的提交对象的指针
index // 保存暂存区信息,在执行git init的时候,这个文件还没有
Git使用
Git的几个区域:
工作区:就是你在电脑里能看到的目录。
暂存区:英文叫stage,或index。一般存放在”git目录”下的index文件(.git/index)中,所以我们把暂存区有时也叫作索引index).
版本库:工作区有一个隐藏目录git。这个不算工作区,而是Git的版本库。
git分为工作区域,暂存区域,本地仓库,远程仓库。在写代码时,代码首先是放到工作区域,然后上传到暂存区域,然后再是本地仓库,具体流程如下:
工作目录 暂存区域 本地仓库 远程仓库
git add –> git commit–> git push –>
git rm <– git clone/git pull <–
git restore <–
git reset –hard 3de15d4 <————-
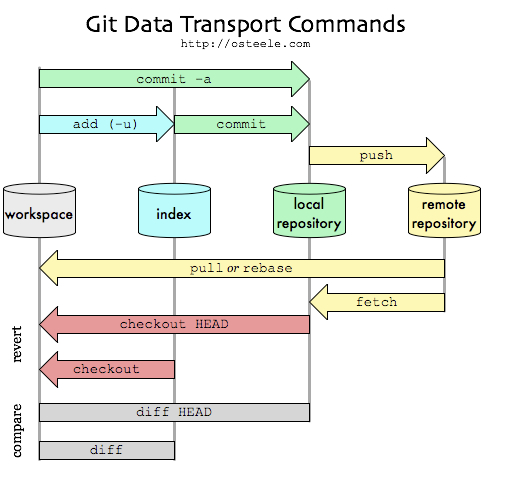
git命令介绍:
git add:将工作目录的代码提交至暂存区域
git rm:从工作区和索引中删除文件
git restore :当工作区的文件删除时可通过该命令恢复,–staged为删除暂存区的文件 git –staged == git rm –cached
git reset –hard xxx:将代码代码恢复到某个版本
git commit :提交暂存仓库的代码到本地仓库
git push / git clone/git pull :推拉远程仓库到本地仓库
git mv : 移动或重命名一个文件、目录或符号链接
git clone:克隆仓库到一个新目录
git diff:显示提交之间、提交和工作区之间等的差异
git show:显示各种类型的对象(仓库中的)和git log -p一样
git log:查看仓库中的版本(只能看到已当前主版本为最新的历史版本)
git log 查看提交的仓库信息
git log –oneline 简略查看
git log -p 查看详细提交的内容
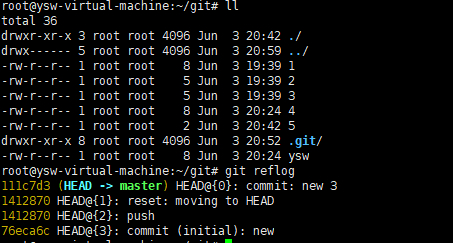
git reflog 查看所有仓库日志(git log只能看到当前主版本)
git reflog:查看仓库中所有代码版本
Git使用示例:
[root@localhost git_data]# touch a b
[root@localhost git_data]# git status
位于分支 master
尚无提交
未跟踪的文件:
(使用 “git add <文件>…” 以包含要提交的内容)
a
b
提交为空,但是存在尚未跟踪的文件(使用 “git add” 建立跟踪)
[root@localhost git_data]# git add a b
[root@localhost git_data]# git status
位于分支 master
尚无提交
要提交的变更:
(使用 “git rm –cached <文件>…” 以取消暂存)
新文件: a
新文件: b
//此时a,b文件已经上传到暂存区域
[root@localhost git_data]# git commit -m “new” a b
[master(根提交) 0958221] new
2 files changed, 0 insertions(+), 0 deletions(-)
create mode 100644 a
create mode 100644 b
[root@localhost git_data]# git log
commit 0958221eeae14b91800e79af6e9056d202a7a22c (HEAD -> master)
Author: ysw 1@11.com
Date: Tue May 25 22:34:59 2021 -0400
New
//Git仓库里面可以看到已提交的。
[root@localhost git_data]# git status
位于分支 master
无文件要提交,干净的工作区
//提交完以后工作区就没有可以提交的了。
删除工作区域并恢复:
[root@localhost git_data]# rm -rf a b
[root@localhost git_data]# git restore a b
//此时文件就恢复了
用git rm删除:
[root@localhost git_data]# git rm a145 b145
rm ‘a145’
rm ‘b145’
[root@localhost git_data]# git reset –hard HEAD
//这里无法通过restore进行恢复,因为git rm是直接将本地和暂存区的都删除了,只能去本地仓库拉取。
改名:
[root@localhost git_data]# git mv a a145
[root@localhost git_data]# git mv b b145
[root@localhost git_data]# ll
总用量 0
-rw-r–r– 1 root root 0 5月 25 22:41 a145
-rw-r–r– 1 root root 0 5月 25 22:41 b145
提交重命名的文件:
[root@localhost git_data]# git status
位于分支 master
要提交的变更:
(使用 “git restore –staged <文件>…” 以取消暂存)
重命名: a -> a145
重命名: b -> b145
[root@localhost git_data]# git commit -m “145” a145 b145
[master 9b2380a] 145
2 files changed, 0 insertions(+), 0 deletions(-)
create mode 100644 a145
create mode 100644 b145
将工作区域更新到仓库某一版本:
[root@localhost git_data]# git log –oneline
9b2380a (HEAD -> master) 145
0958221 new
[root@localhost git_data]# git reset –hard HEAD
HEAD 现在位于 9b2380a 145
删除暂存区的代码文件:
[root@localhost git_data]# echo 111 > c
[root@localhost git_data]# echo 222 > d
[root@localhost git_data]# git add c d
[root@localhost git_data]# git status c d
位于分支 master
要提交的变更:
(使用 “git restore –staged <文件>…” 以取消暂存)
新文件: c
新文件: d
[root@localhost git_data]# git restore –staged c d
[root@localhost git_data]# git status c d
位于分支 master
未跟踪的文件:
(使用 “git add <文件>…” 以包含要提交的内容)
c
d
提交为空,但是存在尚未跟踪的文件(使用 “git add” 建立跟踪)
[root@localhost git_data]# git add c d
[root@localhost git_data]# git rm –cached c d
rm ‘c’
rm ‘d’
[root@localhost git_data]# git status
位于分支 master
未跟踪的文件:
(使用 “git add <文件>…” 以包含要提交的内容)
c
d
提交为空,但是存在尚未跟踪的文件(使用 “git add” 建立跟踪)
git文件比对:
git比对工作区和暂存区的区别 diff:
[root@localhost git_data]# git diff a.txt1
diff –git a/a.txt1 b/a.txt1
index e69de29..2aaba2d 100644
— a/a.txt1
+++ b/a.txt1
@@ -0,0 +1 @@
+asdfasfasf
[root@localhost git_data]# git commit -m “new2 “ a.txt1
[master 4e17e88] new2
1 file changed, 1 insertion(+)
create mode 100644 a.txt1
[root@localhost git_data]# git diff a.txt1
对比暂存区和仓库的区别
[root@localhost git_data]# git add a.txt1
[root@localhost git_data]# git diff –cached a.txt1
diff –git a/a.txt1 b/a.txt1
index 2aaba2d..cc6fda8 100644
— a/a.txt1
+++ b/a.txt1
@@ -1 +1 @@
-asdfasfasf
+1ds
git标签
git tag -a v1.0 -m “banben” //为当前版本库打上标签,如要为指定版本库打标签可先用git reflog找到对应版本的hash值,然后git tag -a v1.0 4e17e88 -m “banben”
git tag //查看历史标签
git reset –hard v1.0 //可以通过标签名回滚
//git的使用本身并没有太多难度,大多数主要就是围绕着工作区域,暂存区域和本地仓库的工作,其流程无非就是在工作区域编写代码然后上传到暂存区域再上传到本地仓库,暂存区域和工作区域的代码文件即使删除也可以通过本地仓库找回来。需要注意的是如果将版本更新到仓库最新以前的版本之后使用git log是看不到最新的版本,只能看到当前主版本及以前的代码,使用log reflog可以看到所有的。
git分支
分支即使平行空间,假设你在为某个手机系统研发拍照功能,代码已经完成了80%,但如果将这不完整的代码直接提供到git仓库中,又可能影响其他人的工作,此时我们便可以在该软件的项目上创建一个名叫“拍照功能”的分支,这个分支只属于你自己,而其他人看不到,等代码编写完成后再与原来的项目主分支合并下即可,这样既能保证代码不丢失,又不影响其他人的工作。
git log –oneline –decorate 默认分支指向最后一次的master分支
git branch testing 新增分支
git branch 查看分支
git checkout testing 切换分支
git branch -d testing 删除分支
git merge xxx 合并分支
合并例:
[root@localhost git_data]# git branch testing // 添加分支
[root@localhost git_data]# git checkout testing //切换分支
A c
A d
切换到分支 ‘testing’
[root@localhost git_data]# ll
总用量 8
-rw-r–r– 1 root root 0 5月 25 22:52 a
-rw-r–r– 1 root root 0 5月 25 23:31 a145
-rw-r–r– 1 root root 0 5月 25 22:52 b
-rw-r–r– 1 root root 0 5月 25 23:31 b145
-rw-r–r– 1 root root 4 5月 25 23:43 c
-rw-r–r– 1 root root 4 5月 25 23:38 d
[root@localhost git_data]# echo dfaf > testing
[root@localhost git_data]# git add testing
[root@localhost git_data]# git commit -m “testing” testing
[testing aed242b] testing
1 file changed, 1 insertion(+)
create mode 100644 testing
[root@localhost git_data]# git log –oneline
aed242b (HEAD -> testing) testing
9b2380a (master) 145
0958221 new
//在这个分支上新增代码并上传
[root@localhost git_data]# git checkout master
A c
A d
切换到分支 ‘master’
[root@localhost git_data]# ll
总用量 8
-rw-r–r– 1 root root 0 5月 25 22:52 a
-rw-r–r– 1 root root 0 5月 25 23:31 a145
-rw-r–r– 1 root root 0 5月 25 22:52 b
-rw-r–r– 1 root root 0 5月 25 23:31 b145
-rw-r–r– 1 root root 4 5月 25 23:43 c
-rw-r–r– 1 root root 4 5月 25 23:38 d
[root@localhost git_data]# git merge testing
更新 9b2380a..aed242b
Fast-forward
testing | 1 +
1 file changed, 1 insertion(+)
create mode 100644 testing
//切换到主版本并合并分支
[root@localhost git_data]# ll
总用量 12
-rw-r–r– 1 root root 0 5月 25 22:52 a
-rw-r–r– 1 root root 0 5月 25 23:31 a145
-rw-r–r– 1 root root 0 5月 25 22:52 b
-rw-r–r– 1 root root 0 5月 25 23:31 b145
-rw-r–r– 1 root root 4 5月 25 23:43 c
-rw-r–r– 1 root root 4 5月 25 23:38 d
-rw-r–r– 1 root root 5 5月 26 01:54 testing
[root@localhost git_data]# git log –oneline
aed242b (HEAD -> master, testing) testing
9b2380a 145
0958221 new
//新增分支时分支会复制主版本master的所有代码文件,此时分支与master一样,在分支上新增了代码后,这时分支上的代码比主版本新,可以通过merge合并分支。合并时如果代码冲突会合并失败,合并失败需手动修正冲突。
git远程仓库:
这里有两台主机,分别是git-server和git-client,虽然git是分布式,但是为了区分一下就这样命名了。
这里是git-server上已经建立好的仓库(master分支):
git-client:
git clone ssh://10.10.10.85/root/git/.git //需要输入密码,如果不想输入密码可以通过ssh-keygen生成密钥将公钥传到server上这样client可以免密登录
1 | |
此时便克隆成功了
还有一种方式是通过git remote add:
clone无需创建文件夹,可以直接把库复制过来,remote要麻烦一点,需要手动创建文件夹以及空库
首先创建一个文件夹:
1 | |
此时就成功了
在本地创建新代码并推送至远程仓库:
首先将在本地创建测试代码并上传到本地仓库:
1 | |
然后上传到远程仓库
1 | |
git-server:
1 | |
gitlab
GitLab是一个用于仓库管理系统的开源项目。使用Cit作为代码管理工具,并在此基础上搭建起来的web服务。可通过Web界面进行访问公开的或者私人项目。它拥有与Github类似的功能,能够浏览源代码,管理缺陷和注释。可以管理团队对仓库的访问,它非常易于浏览提交过的版本并提供一个文件历史库。团队成员可以利用内置的简单聊天程序(Wall进行交流。它还提供一个代码片段收集功能可以轻松实现代码复用。
gitlab服务构成:
nginx静态web服务器
gitlab-workhorse:轻量级的反向代理服务器
logrotate:日志文件管理工具
postgresql:数据库
redis:缓存数据库
sidekiq:用在后台执行队列任务(异步执行)。(Ruby)
unicorn:an http server for rack applications .gitlab rails应用是托管在这个服务器上面的
gitlab安装:
redhad:
sudo dnf install -y curl policycoreutils openssh-server perl
https://packages.gitlab.com/gitlab/ //去官网下载包
curl -s https://packages.gitlab.com/install/repositories/gitlab/gitlab-ce/script.rpm.sh | sudo bash
sudo yum install gitlab-ce-13.11.4-ce.0.el8.x86_64
ubuntu安装:(换成国内源)
- 安装配置依赖项 sudo apt-get update
sudo apt-get install -y curl openssh-server ca-certificates
2.安装发送邮件的(可以用自己熟悉的代替) sudo apt-get install -y postfix
安装过程中会弹出对话框,按TAB键让按钮点亮后按Enter或者空格。填文字的地方随便写,是邮件中显示的发送者。
3.下载安装脚本 curl https://packages.gitlab.com/install/repositories/gitlab/gitlab-ce/script.deb.sh | sudo bash
4.修改安装脚本 vim /etc/apt/sources.list.d/gitlab_gitlab-ce.list
把原来的两行删除或者注释(#是行注释),然后增加
deb https://mirrors.tuna.tsinghua.edu.cn/gitlab-ce/ubuntu bionic main
deb-src https://mirrors.tuna.tsinghua.edu.cn/gitlab-ce/ubuntu bionic main
再次执行
sudo apt-get update
http://t.zoukankan.com/whm-blog-p-11557498.html
5.安装
sudo apt-get install gitlab-ce=13.10.5-ce.0
完成后需要改一下external_url,将其改为本机的ip地址(访问地址)
vim /etc/gitlab/gitlab.rb:
external_url ‘http://10.10.10.10‘
sudo gitlab-ctl reconfigure
初始化完成以后
gitlab-ctl status //查看gitlab进程状态
gitlab-ctl start //启动,但初始化完成会自动启动,不用再启动。
访问地址:http://ip
启动了以后访问出现报错:
Whoops, GitLab is taking too much time to respond. 502
可以free -h看一下内存,一般是内存不够
使用:
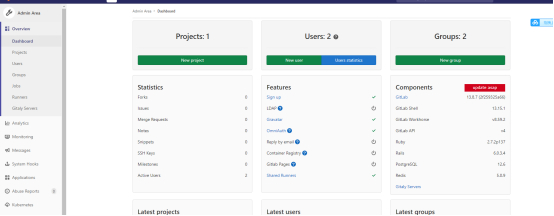
第一次登录需要修改密码,账号为root。首页:
注册限制:
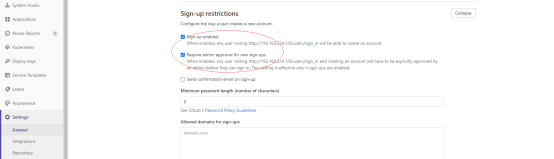
设置了注册限制以后无法在登录页面注册,只能通过管理员账号添加注册账号
中文设置:
首次登陆需要重置密码,用户为root,然后设置流程为
右上角的头像-preferences-Localization-language-简体中文
备份:
对gitlab进行备份将会创建一个包含所有库和附件的归档文件。对备份的恢复只能恢复到与备份时的gitlab相同的版本。将gitlab迁移到另一台服务器上的最佳方法就是通过备份和还原。
gitlab提供了一个简单的命令行来备份整个gitlab,并且能灵活的满足需求。
备份文件将保存在配置文件中定义的backup_path中,文件名为TIMESTAMP_gitlab_backup.tar,TIMESTAMP为备份时的时间。TIMESTAMP的格式为:EPOCH_YYYY_MM_DD_Gitlab-version.
如果自定义备份目录需要赋予git权限
配置文件中加入
gitlab_rails[‘backup_path’] = “/data/ backup/gitlab”
gitlab_rails[‘backup_keep_time’ = 604800
备份保留的时间(以秒为单位,这个是七天默认值),
mkdir / data/ backup/gitlab
chown -R git.git /data/ backup/gitlab
完成后执行gitlab-ctl reconfigure
备份
gitlab-rake gitlab:backup:create
恢复
gitlab-rake gitlab:backup:restore BACKUP=1537261122_2018_09_18_9.2.5
gitlab配置smtp邮件功能:
vim /etc/gitlab/gitlab.rb:
gitlab_rails[‘smtp_enable’] = true
gitlab_rails[‘smtp_address’] = “smtp.qq.com”
gitlab_rails[‘smtp_port’] = 465
gitlab_rails[‘smtp_user_name’] = “1072023998@qq.com“
gitlab_rails[‘smtp_password’] = “jlgwsbmvbedebfdf”
gitlab_rails[‘smtp_domain’] = “smtp.qq.com”
gitlab_rails[‘smtp_authentication’] = “login”
gitlab_rails[‘smtp_enable_starttls_auto’] = true
gitlab_rails[‘smtp_tls’] = true
gitlab_rails[‘smtp_pool’] = false
gitlab_rails[‘gitlab_email_enabled’]=true
gitlab_rails[‘gitlab_email_display_name’]=’gitlab’
gitlab_rails[‘gitlab_email_from’]=‘1072023998@qq.com‘
gitlab_rails[‘gitlab_email_reply_to’]=‘1072023998@qq.com‘
gitlab_rails[‘gitlab_email_subject_suffix’]=’[gitlab]’
修改完成后初始化配置
gitlab-ctl reconfigure
gitlab-ctl stop &&gitlab-ctl start
完成以后测试:
gitlab-rails console
irb(main):002:0>
Notify.test_email(‘1072023998@qq.com‘,’Message Subject’,’Message Body’).deliver_now
测试邮件发送后前往邮箱查看
创建用户,组,项目:
新建用户:
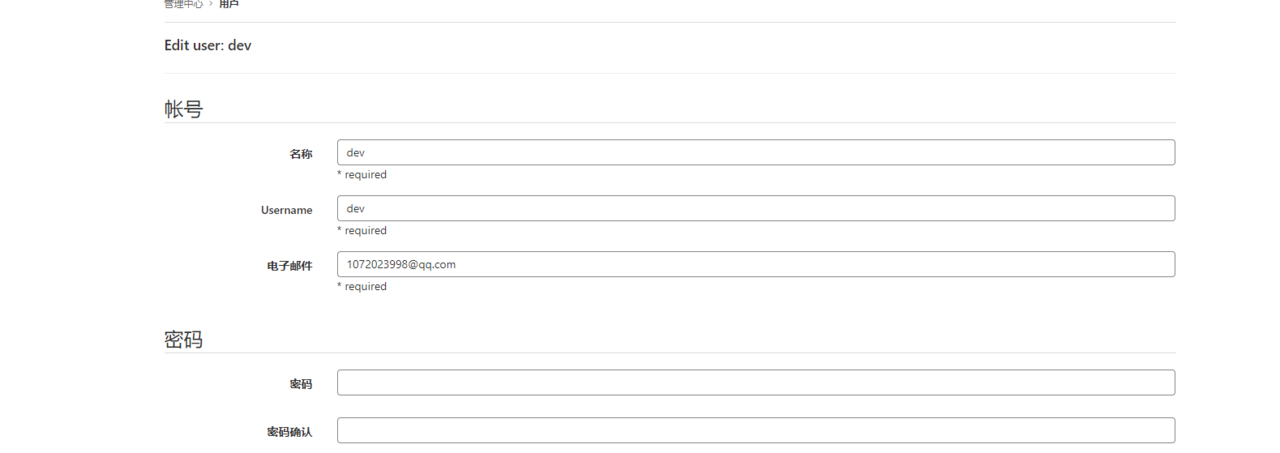
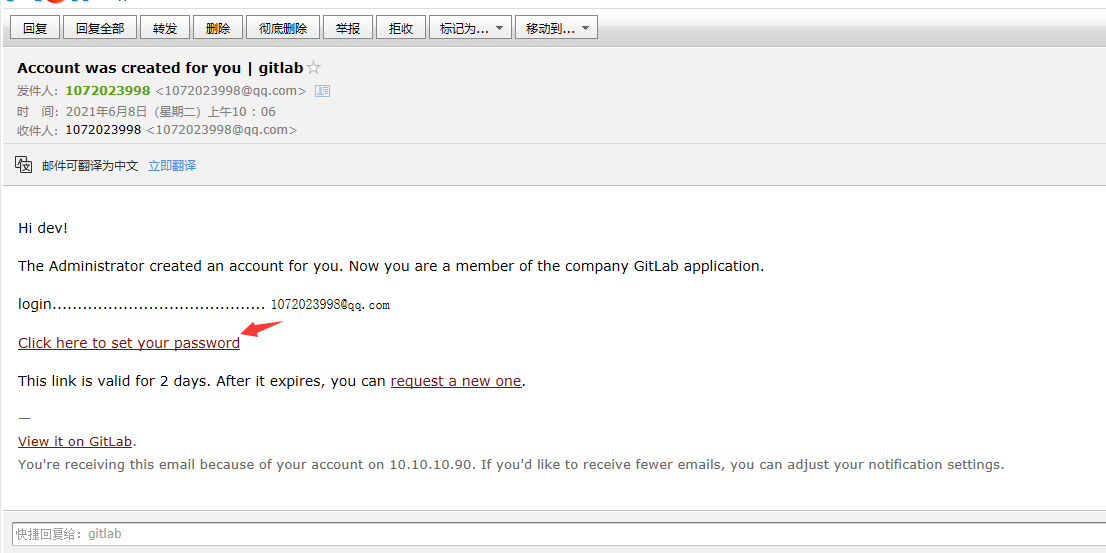
这里如果输入了正确的邮箱并设置了发送邮箱的服务器,便会在用户创建完成以后向该邮箱发送邮件
点击修改密码
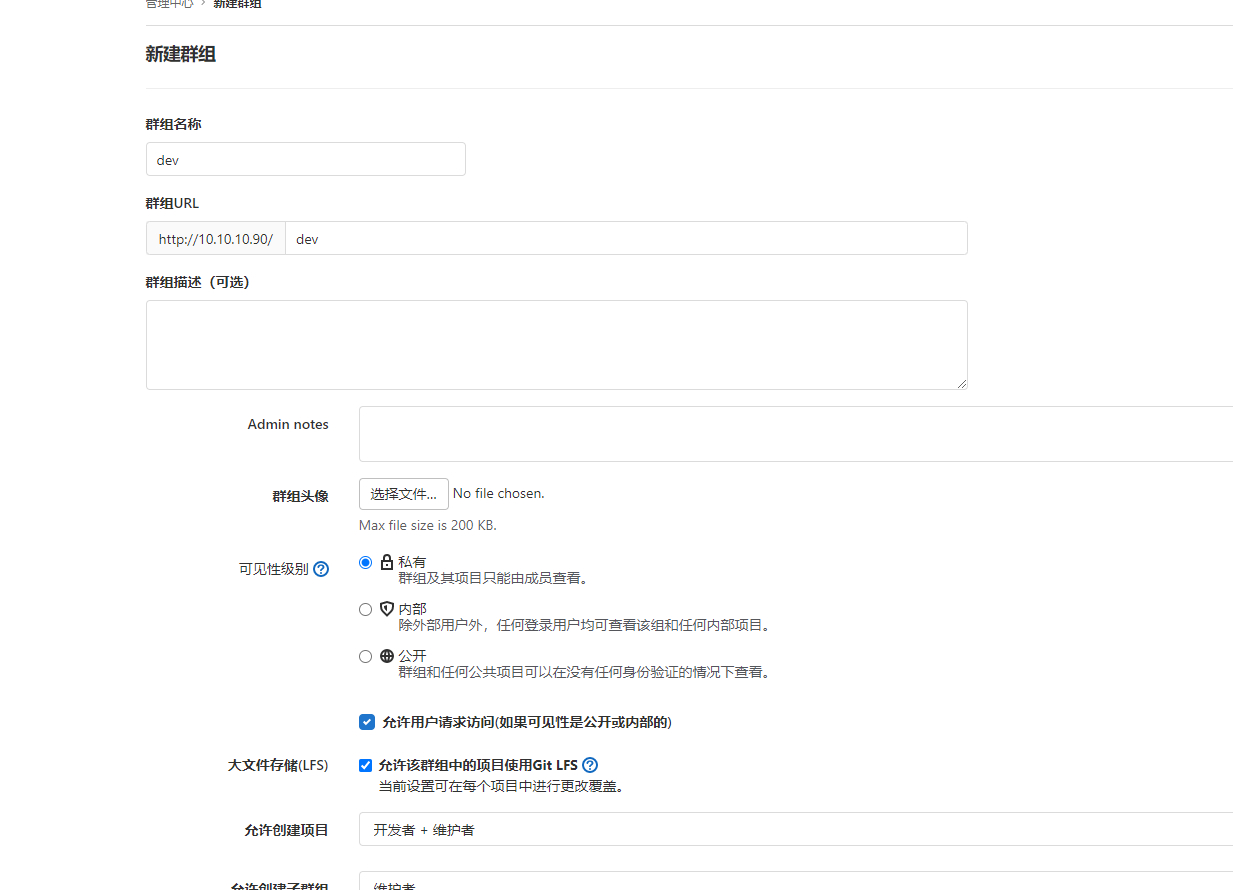
创建群组:
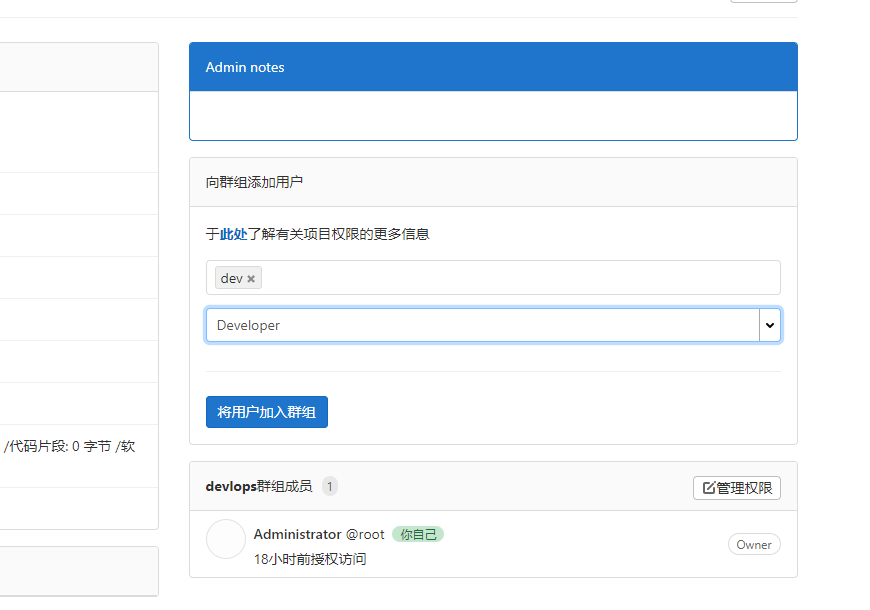
将用户加入群组并授予开发者权限
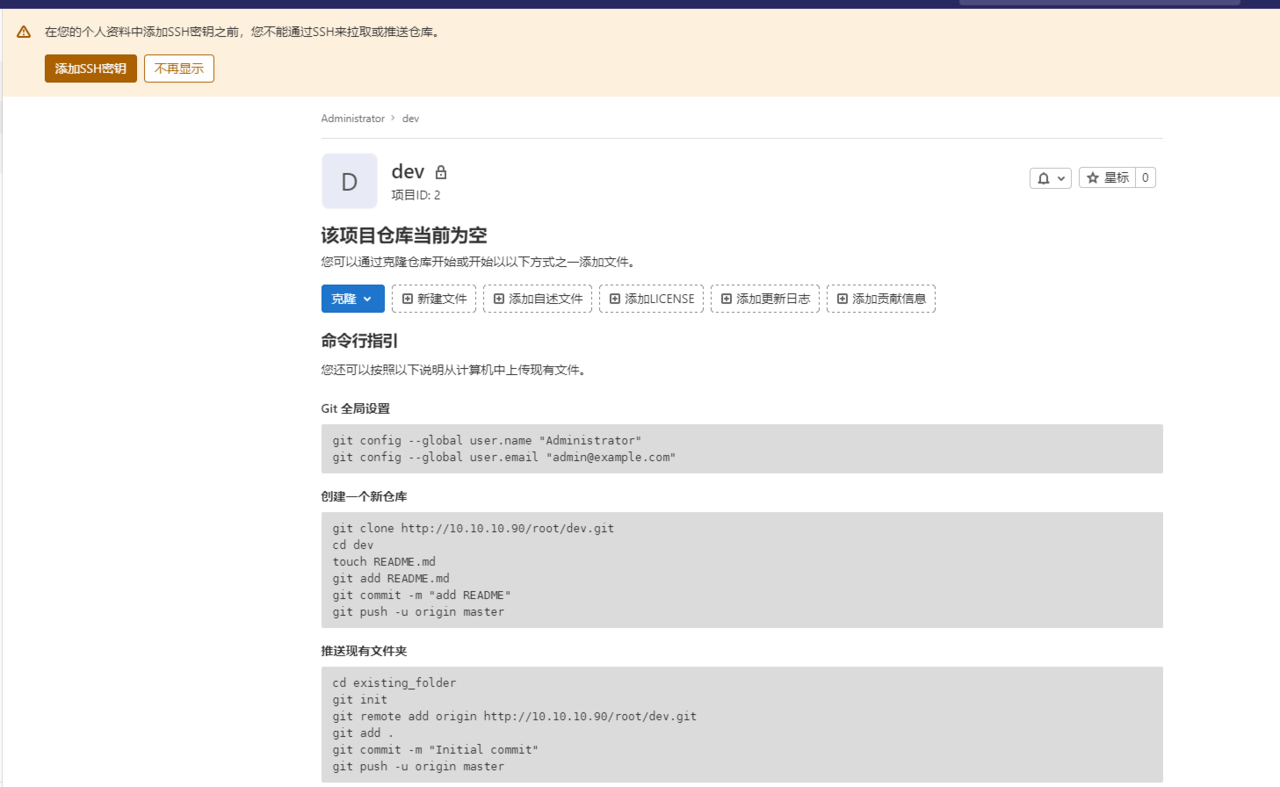
新建项目:

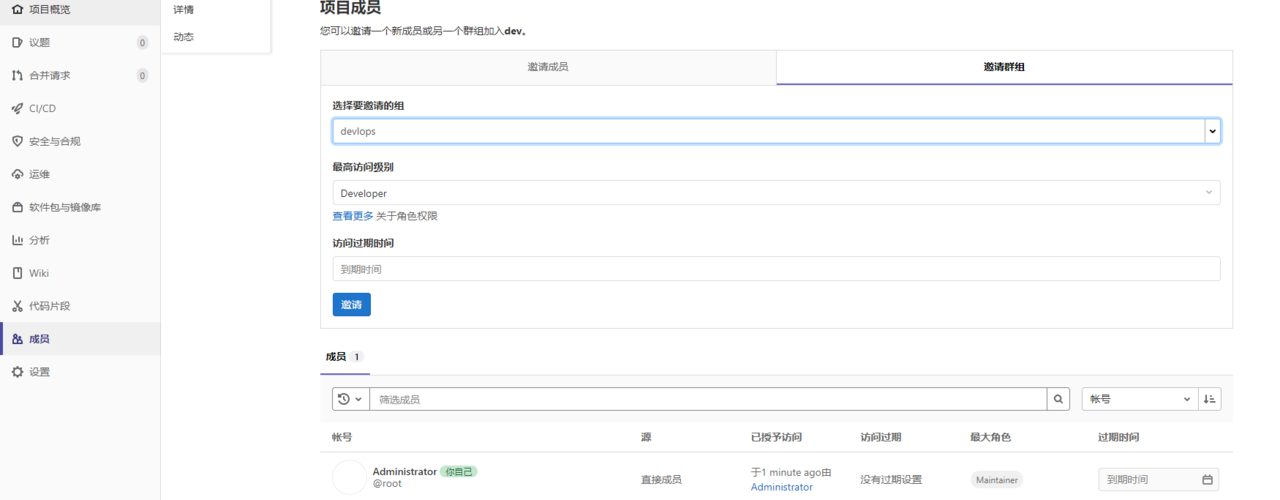
邀请成员或群组便可以使其加入该项目
此时就应该将gitlab作为git的远程仓库来进行使用了。
将gitlab作为git的远程仓库:
下面是创建完后gitlab自带的命令行指示:
1 | |
如果是gitlab有数据git上没有就在git上使用clone。如果是将git上的代码仓库推送到gitlab上就用推送现有文件夹或推送现有仓库。
因git与gitlab传输时可以通过两种方式,http与ssh
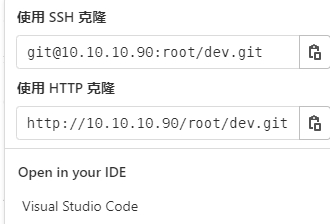
这里我们使用ssh,首先在linux(git-server)上创建秘钥并把公钥传到gitlab上以实现免密传输。
1 | |
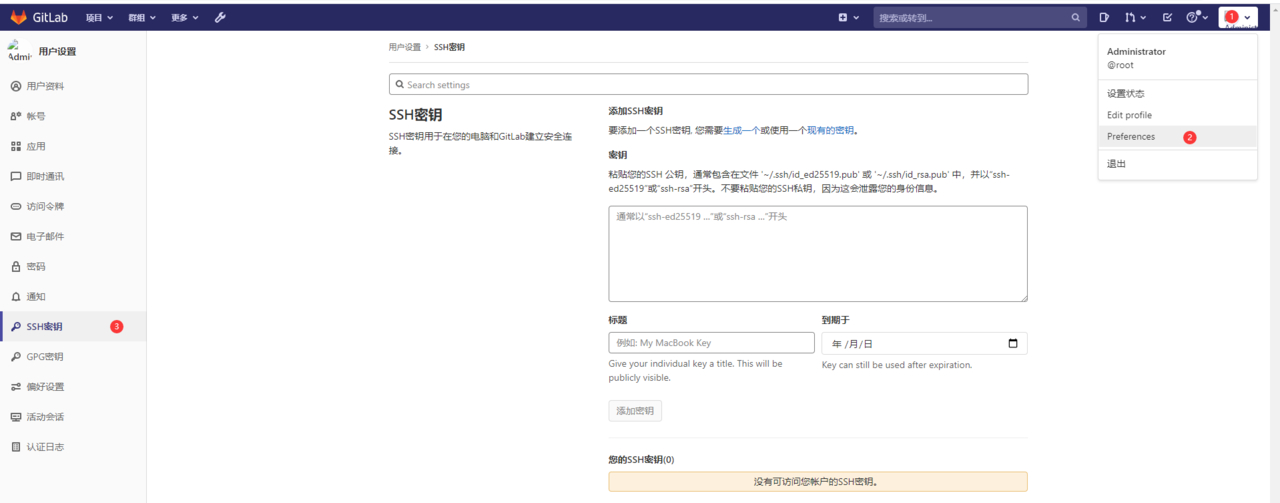
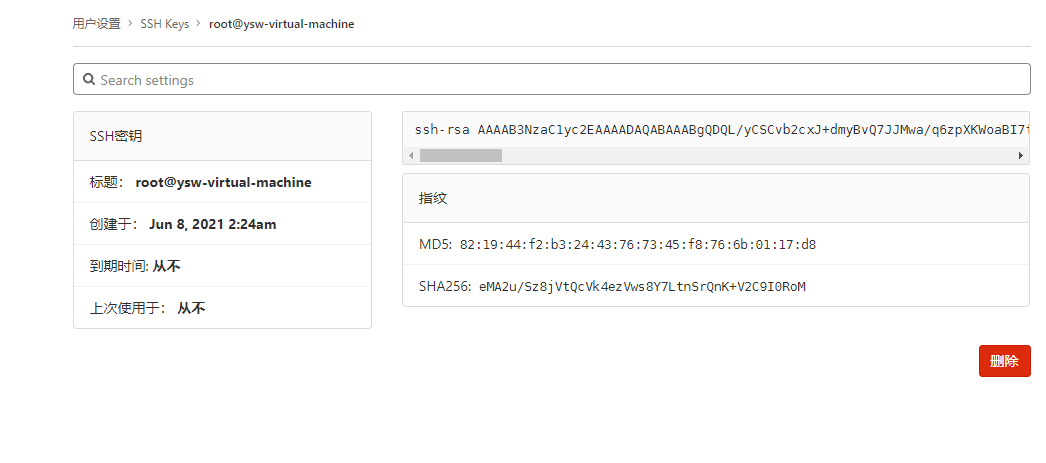
粘贴复制的公钥
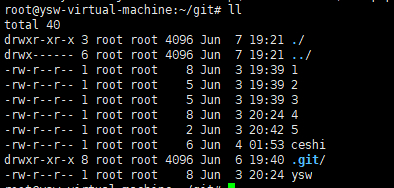
由于这里git本地已有仓库,就通过remote设置远程仓库然后将代码推送过去
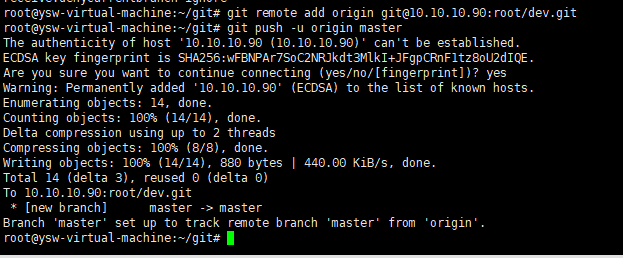
此时刷新一下gitlab可以看到
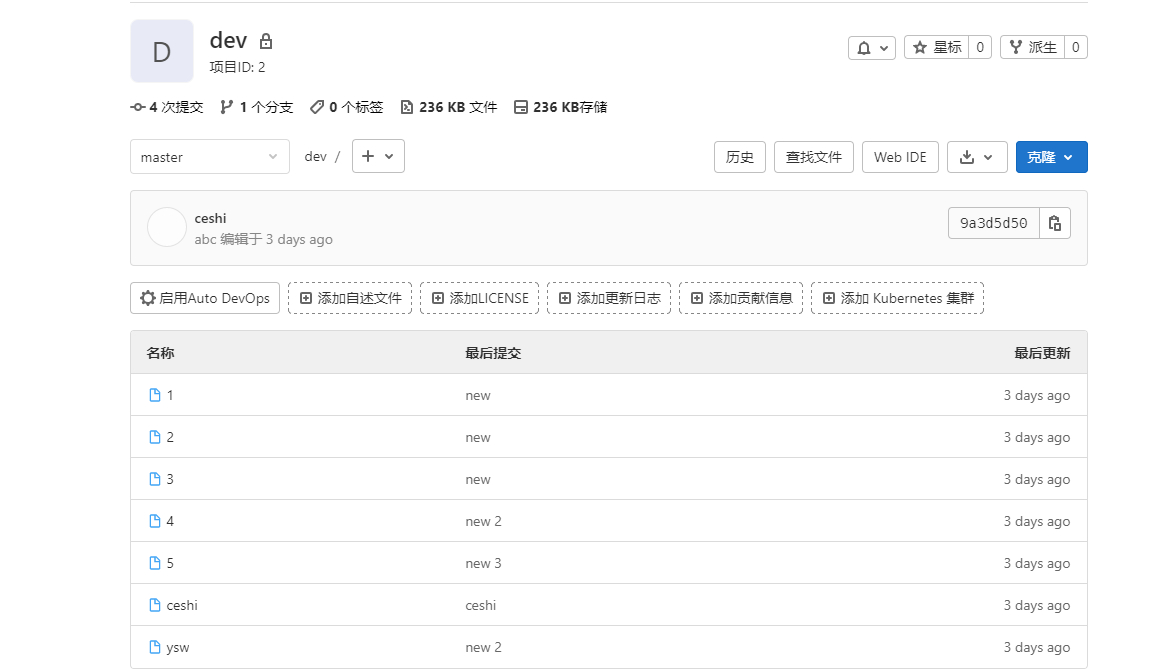
所有代码文件都上传上来了!
本博客所有文章除特别声明外,均采用 CC BY-SA 4.0 协议 ,转载请注明出处!